Creating Vendor/Customer Invoice Manually
- On the navigation bar, select the Purchase tab and Vendor Invoice menu.
- On the page, to the right, please click the New Vendor Invoice button.
- You can attach document by clicking on the paper clip icon on the right.
- Journal entry will be created once the header is saved and will be updated accordingly to any changes made.
- Complete the form and click Save as draft or Approve.
*Note: Approved invoice cannot be edited or deleted
Generate Invoice from PDF or Image
- On the navigation bar, select the Document tab.
- Click on Upload on the right to upload PDF or image file(s).
- Wait for the file to be processed and once it is ready, click on the ellipses and select create invoice.
- The AI will read from the document and automatically fill in the information.
*Note: Review is still needed to make sure all the information input is correct - The posting account is automatically selected based on the previous account selected. No account will be selected if it is the first invoice created for the vendor.
Recording a Payment
- On the navigation bar, select the Purchase tab and Vendor Payment menu.
- On the page, to the right, please click the New Vendor Payment button.
- Fill up the payment information and click Save & add invoice.
- Journal entry will be created once the header is saved and will be updated accordingly to any changes made.
- Select an invoice or multiple invoices in draft or approved status to add in the payment.
- Payment amount for each invoice can be edited.
- Click on Save as draft or Approve.
*Note: Approved payment cannot be edited or deleted
Creating a prepayment
To create a prepayement, you'll have to:
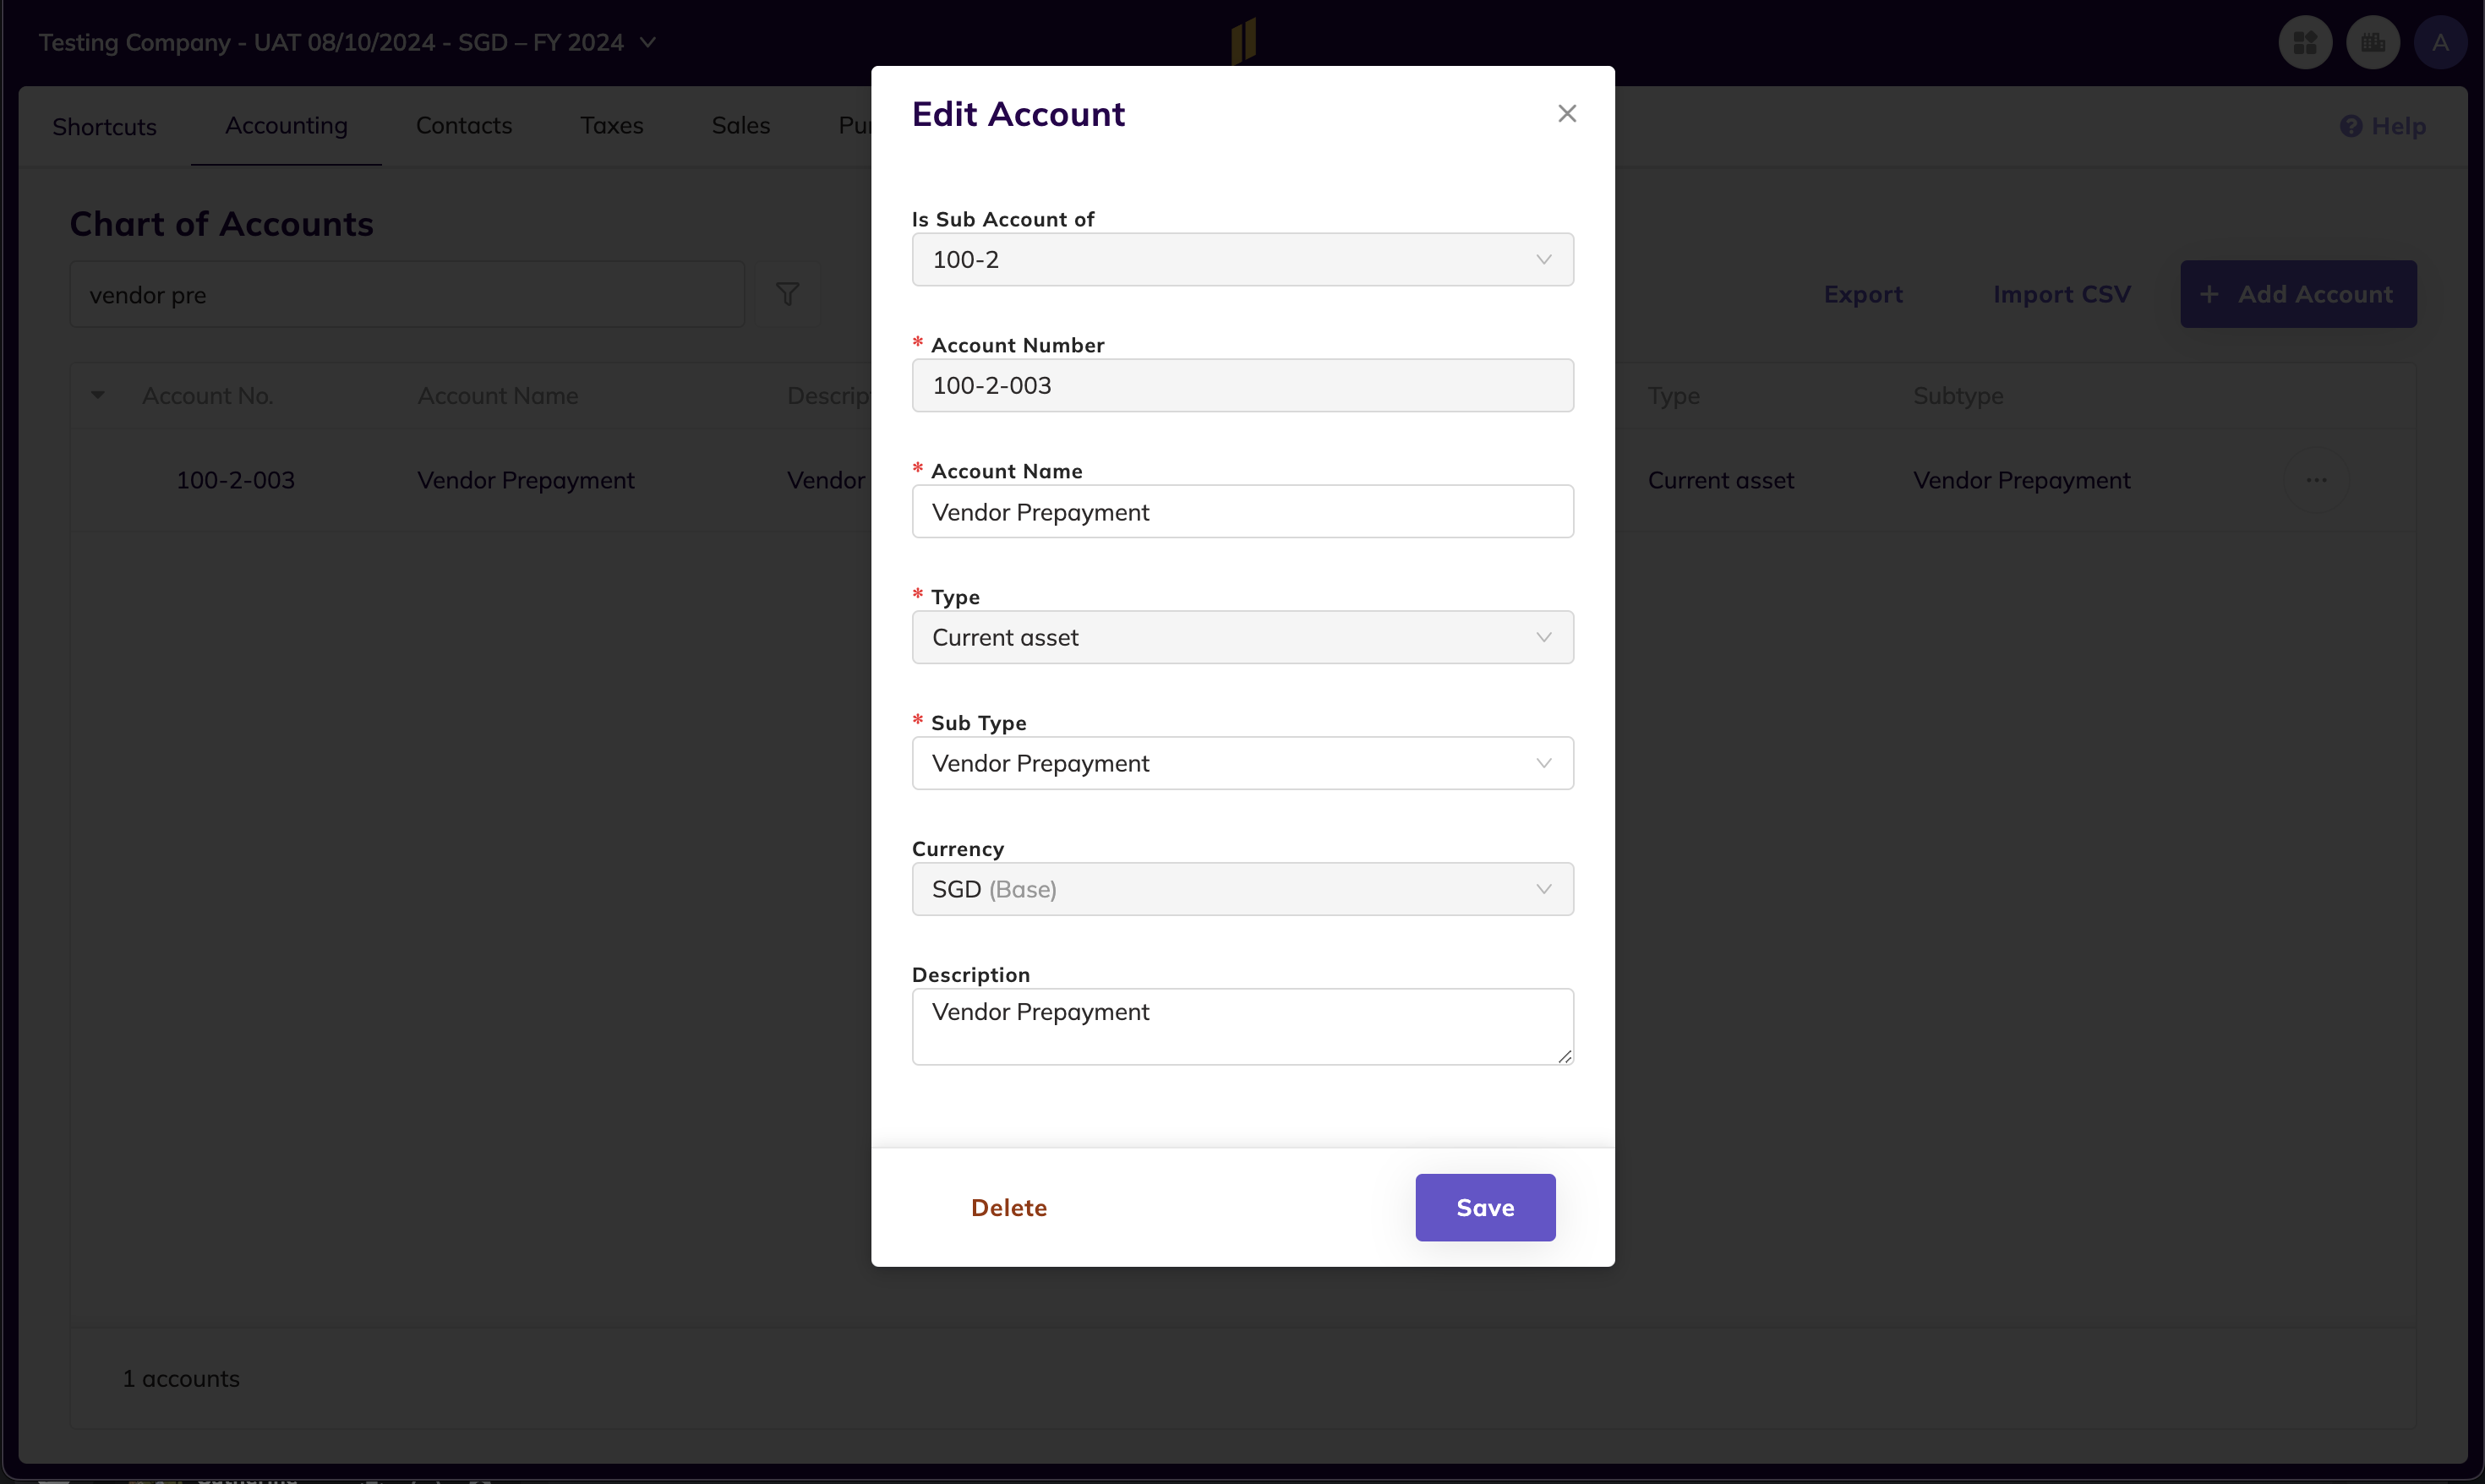
- Create a prepayment account.
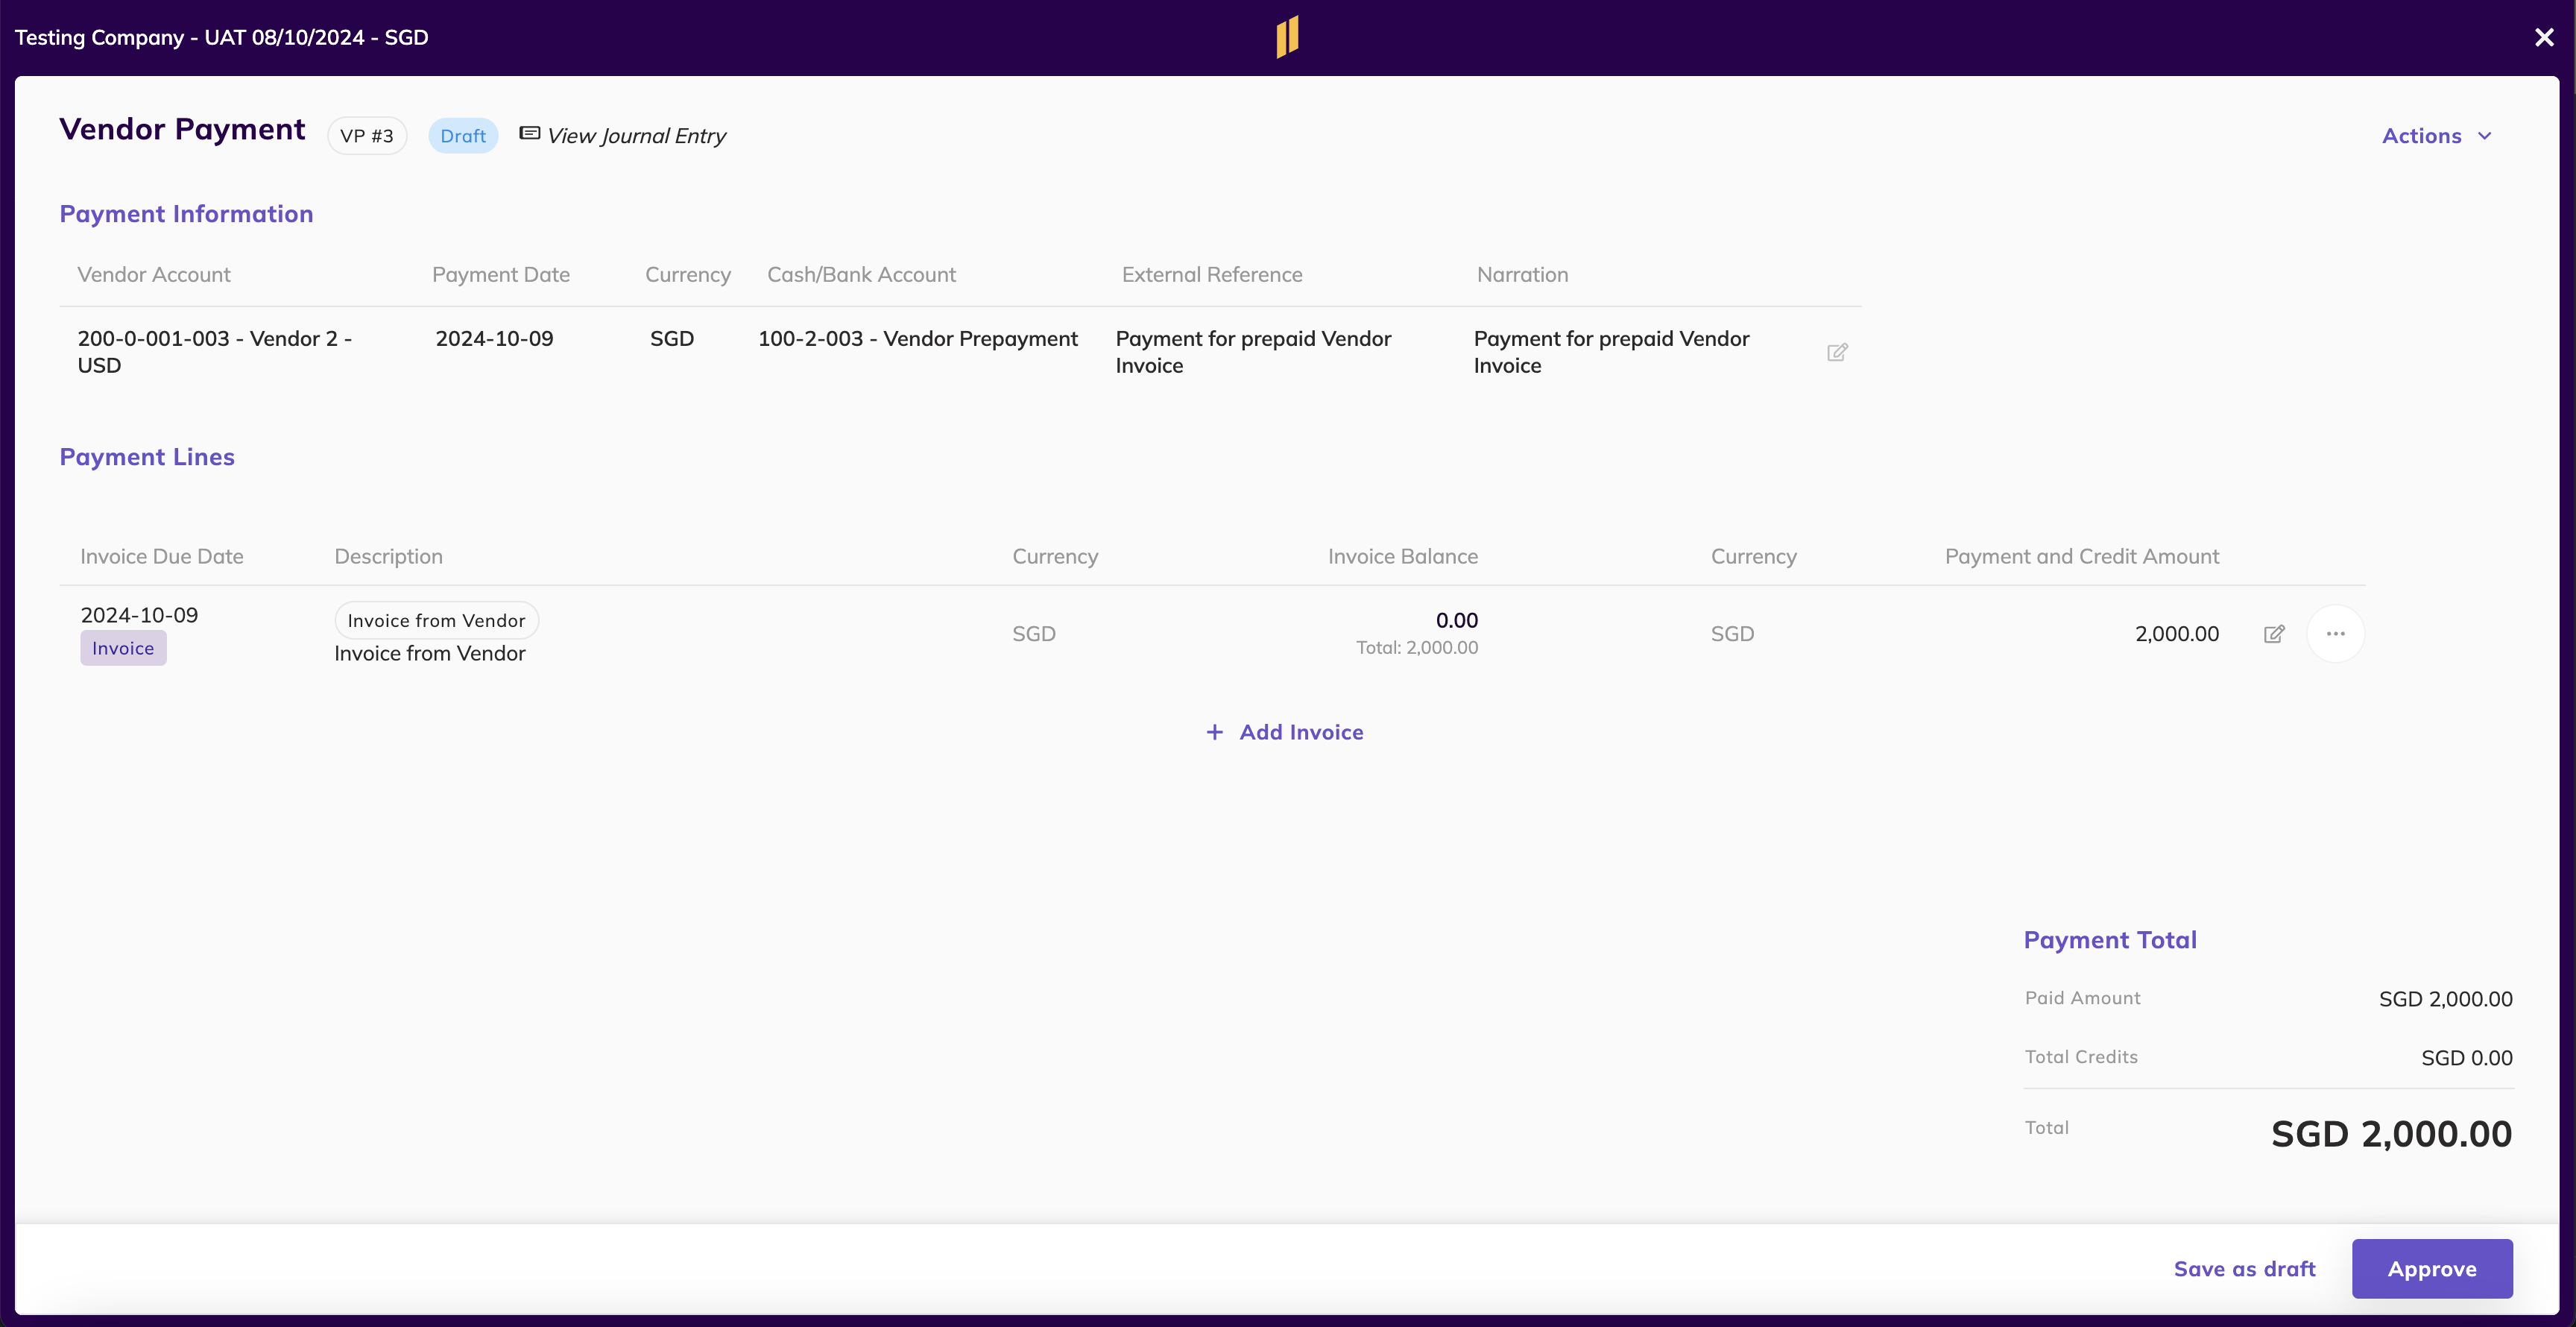
- Create a payment using the prepayment account.
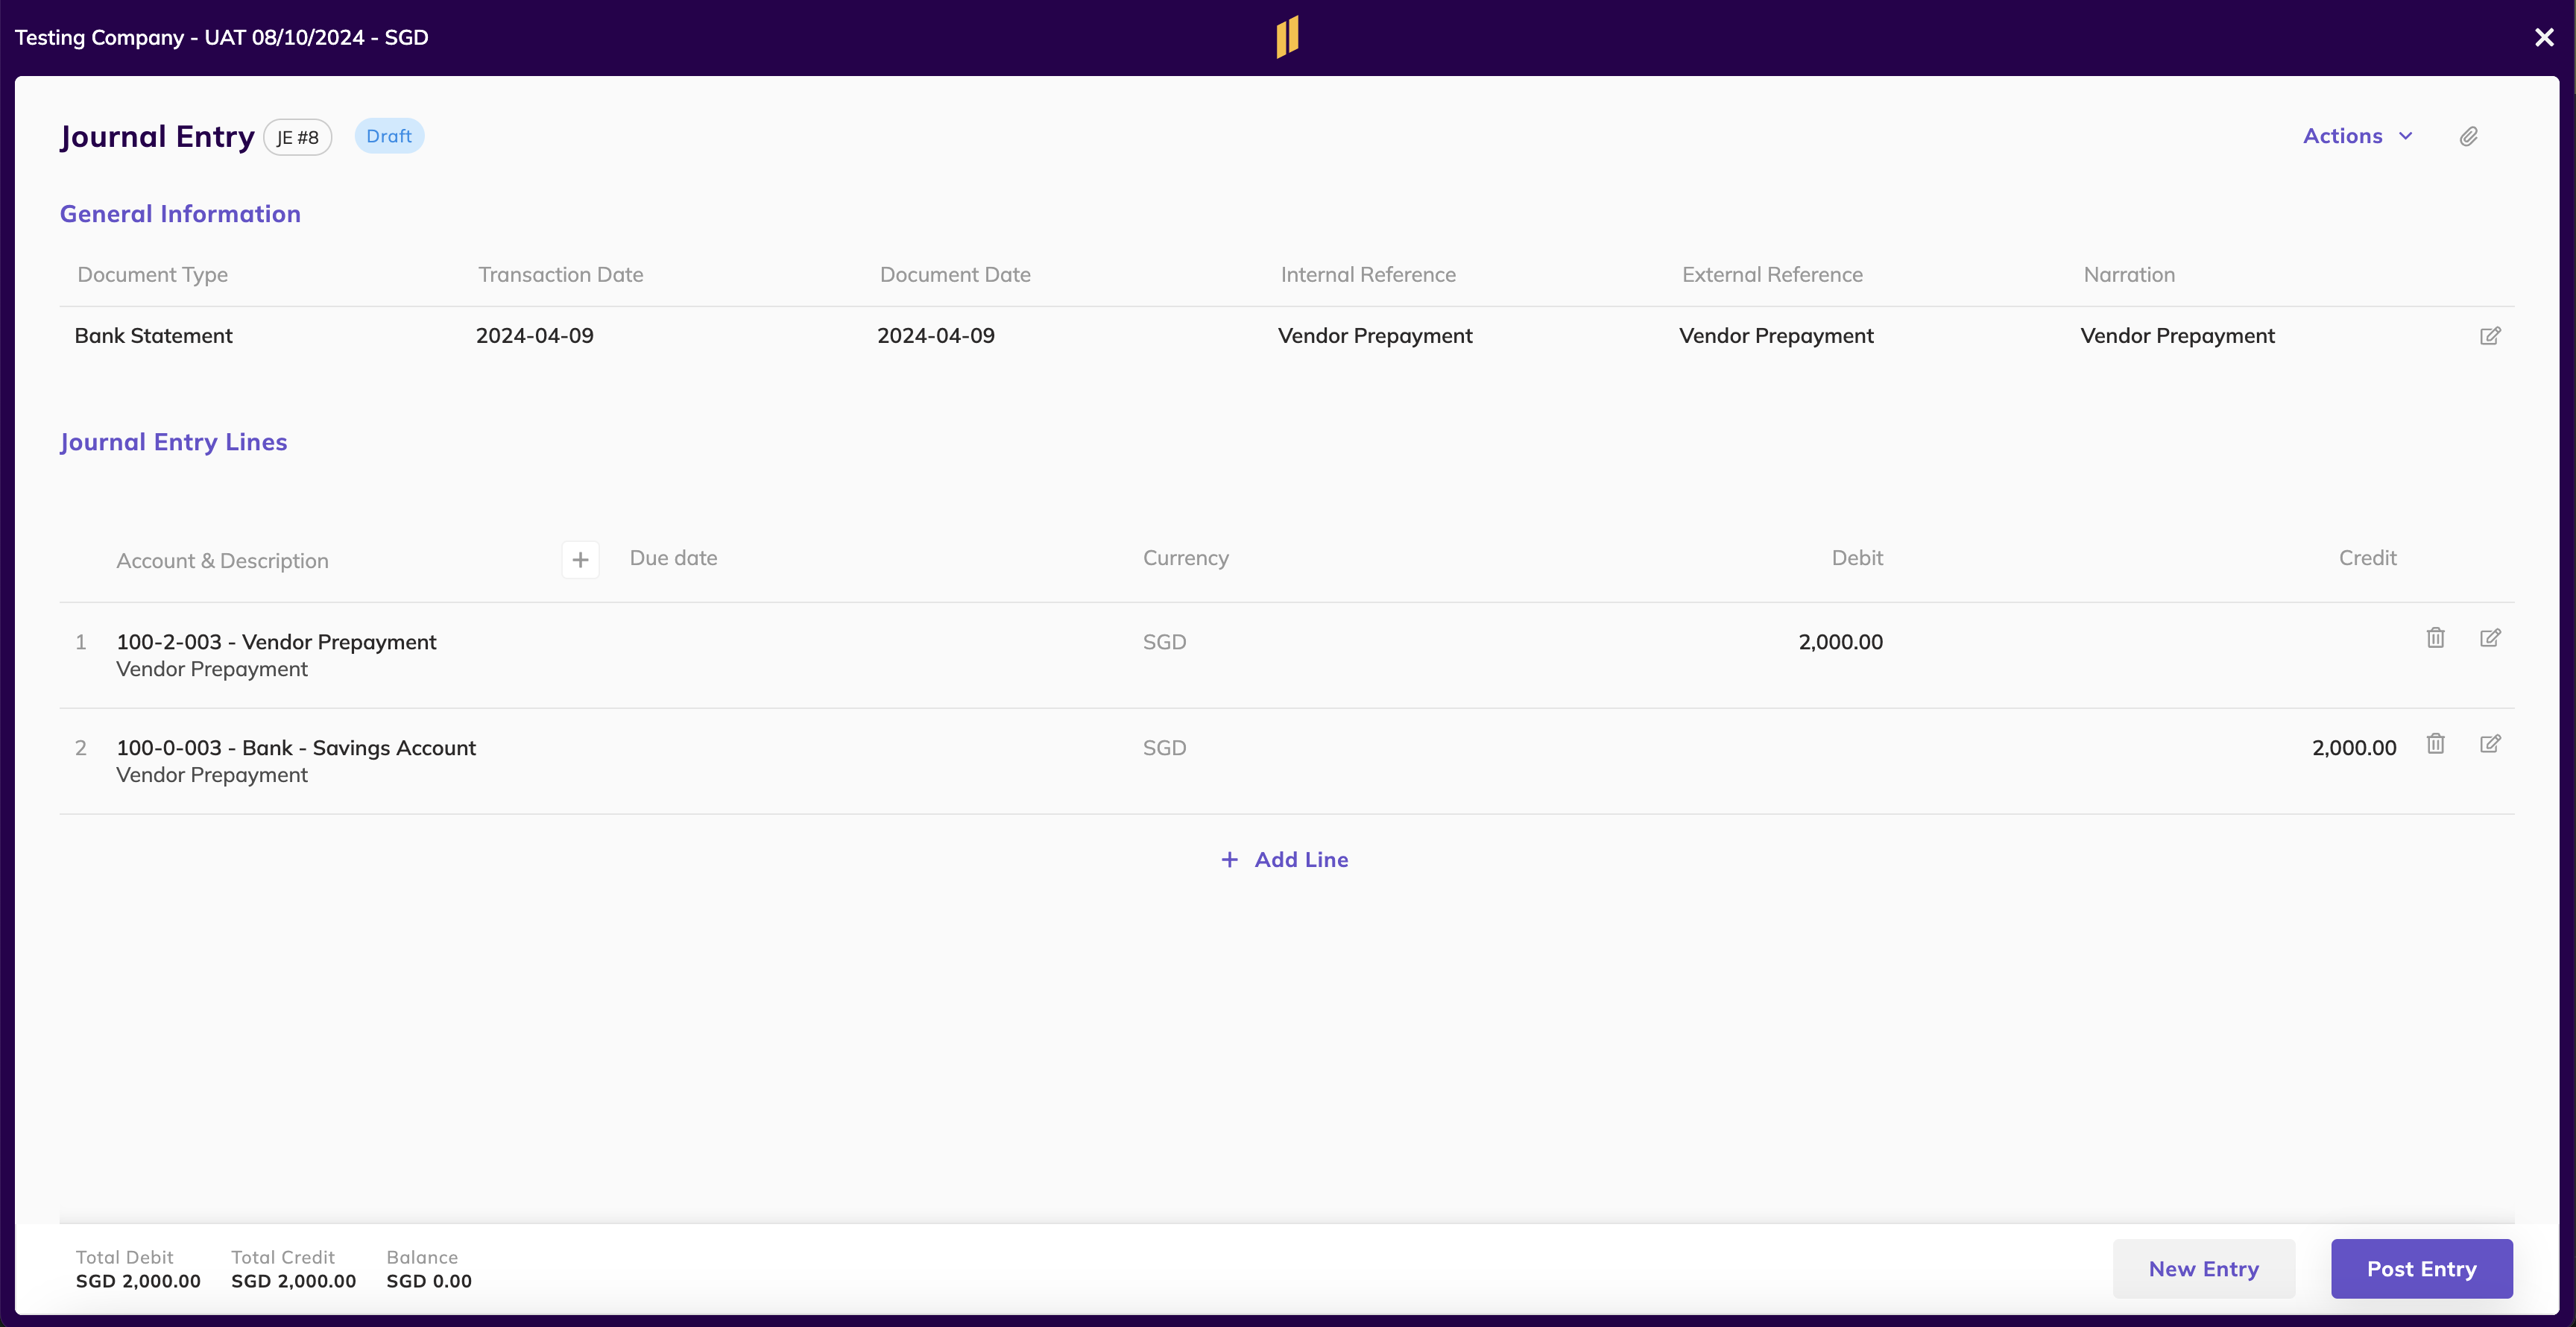
- Create a journal entry with document type of bank statement.
1. Create a prepayment account

- On the navigation bar, select the Accounting tab and Chart of Accounts menu.
- Click on Add Account to create a new account.
- Create a journal entry with document type of bank statement.
2. Create a journal entry with document type of bank statement

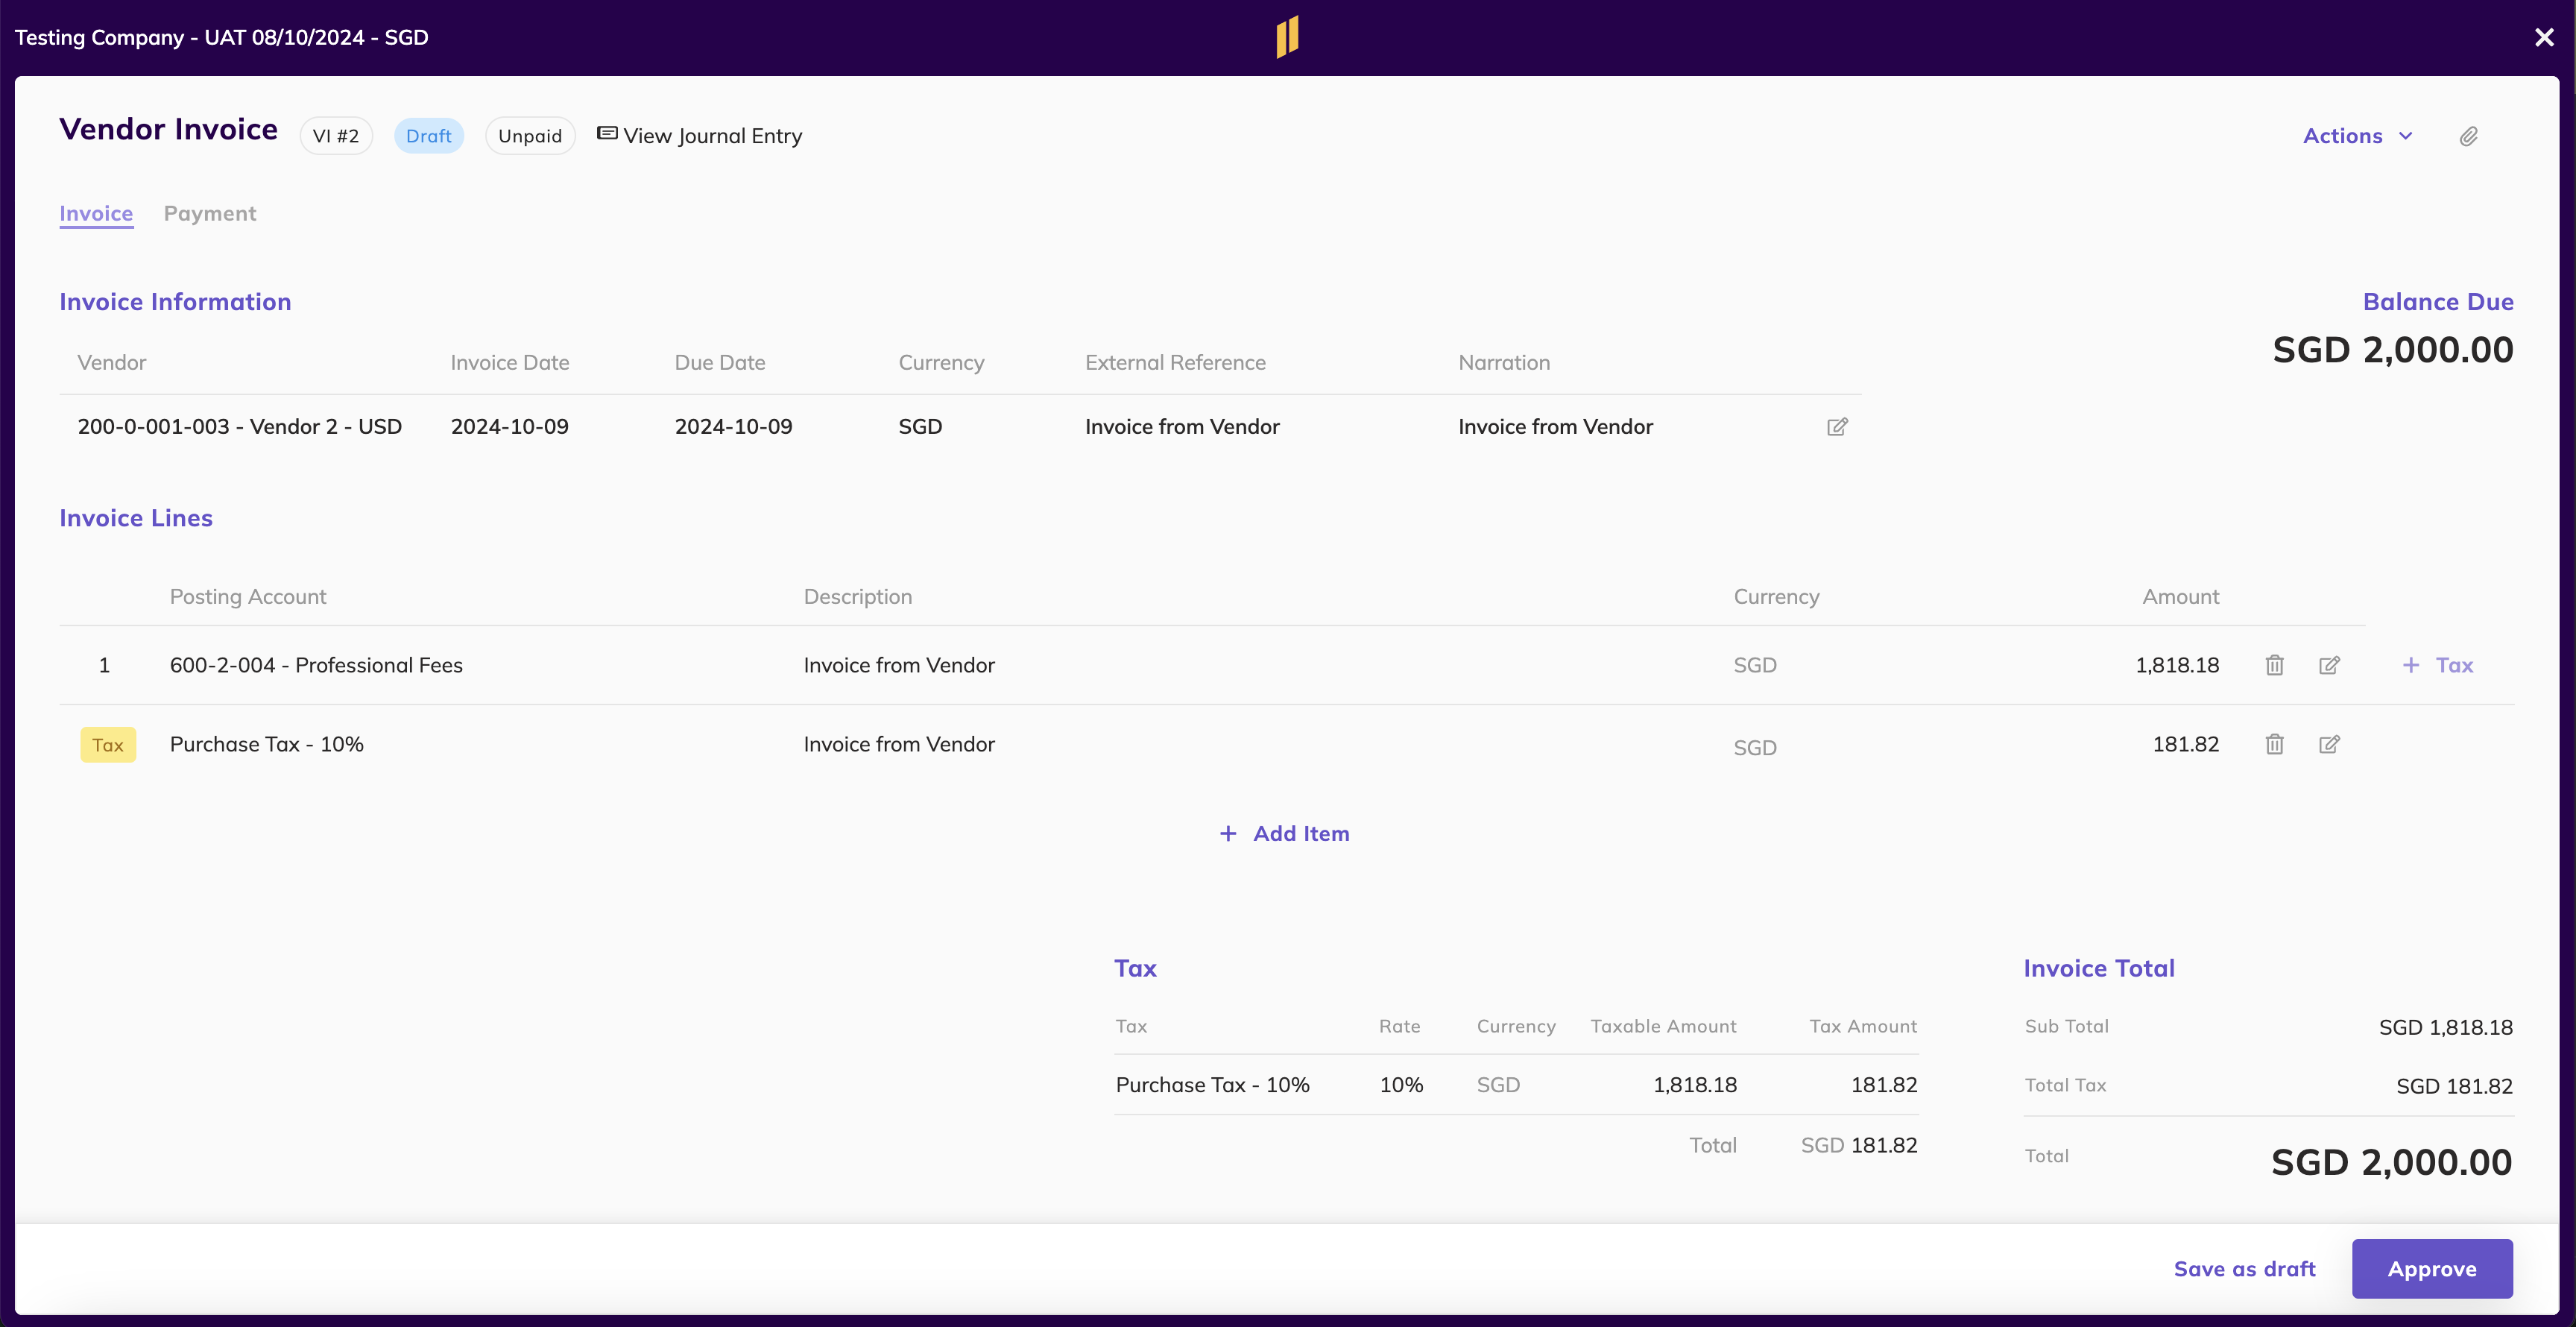
3. Create an Invoice

4. Create a payment

5. Prepayment done

On your GL, the prepayment balance will have been zeroed.
Notes:
- If the Vendor Invoice amount is greater than the vendor prepayment amount, you will need to first record the payment of the prepayment amount as a vendor payment and then create another vendor payment for the payment of the balance.
- If the Vendor Invoice amount is lower than the prepayment amount, you will need to record the payment of the prepayment amount as the amount of the Vendor Invoice. This will leave the balance to the prepayment amount until it is used in other invoices or you can use the Credit Memo to move the balance from the Prepayment account to the Account Payable amount.


